How to measure your wall before ordering your wallpaper?
To measure your wall correctly, you need to know the width and height in the largest places. That is, measure the width at its widest point and the height at its highest point.
🧰 Recommended equipment:
Equip yourself with a tape measure, a folding ruler or a laser rangefinder for those who live in the future.
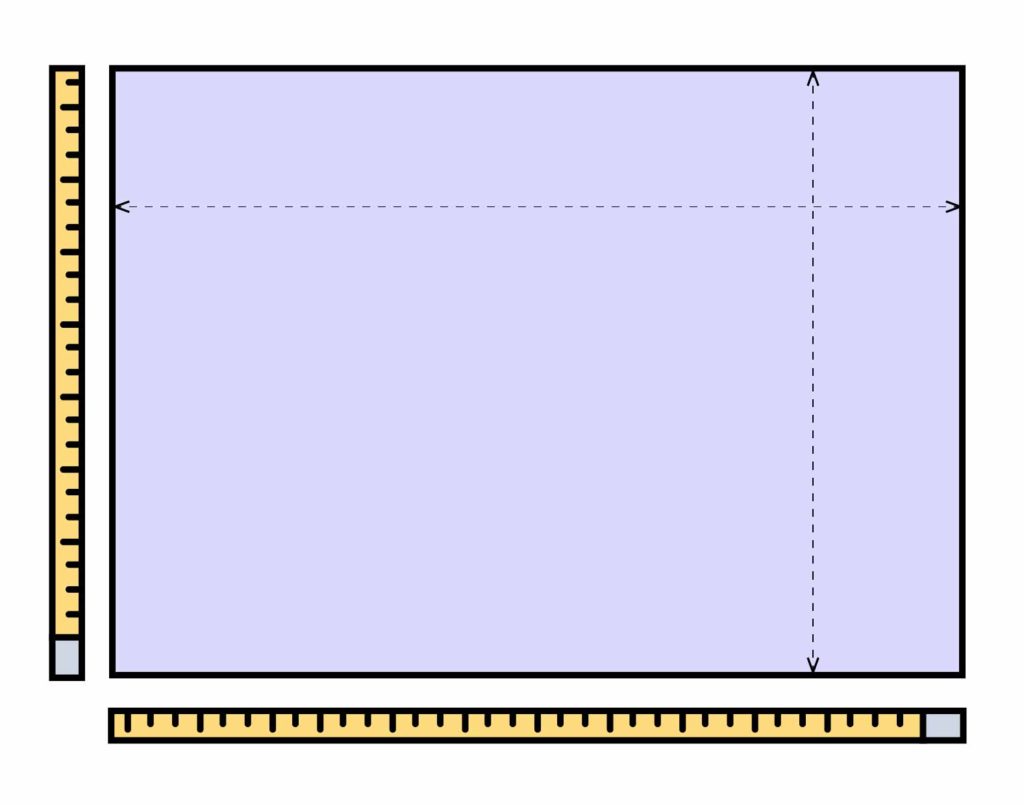
Measuring a Standard Wall
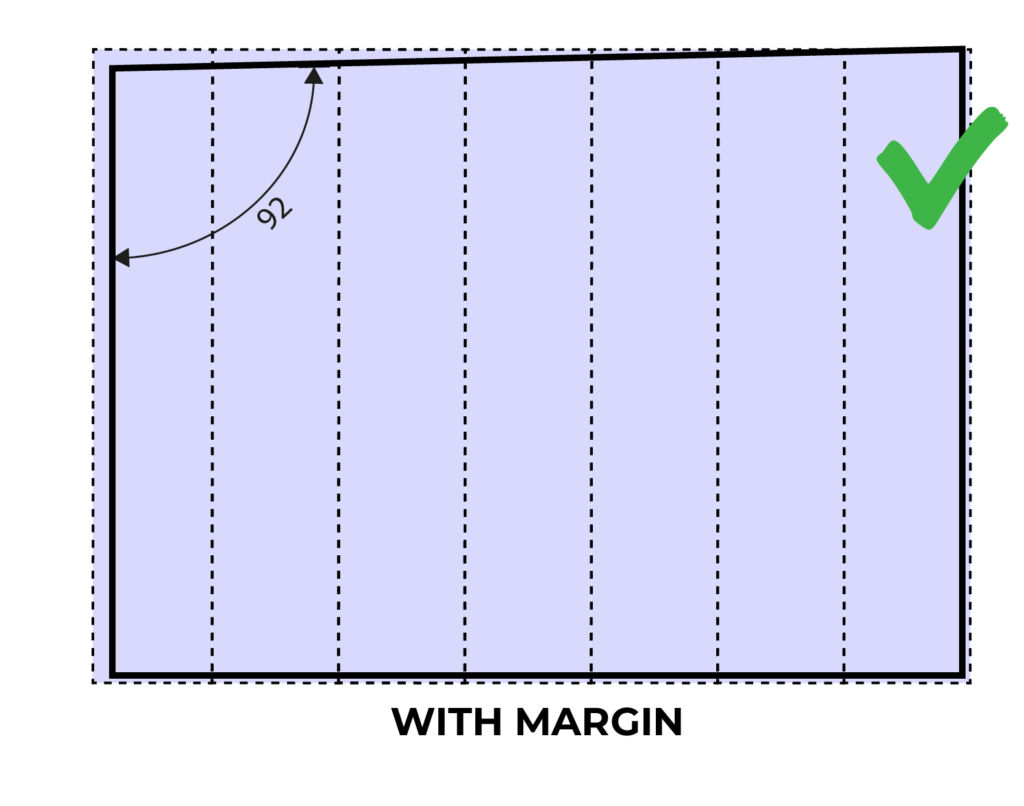
Take measurements of the width and height of your wall. Easy. As walls are rarely straight, remember to allow a small margin for installation (we recommend between 5 and 10 cm).
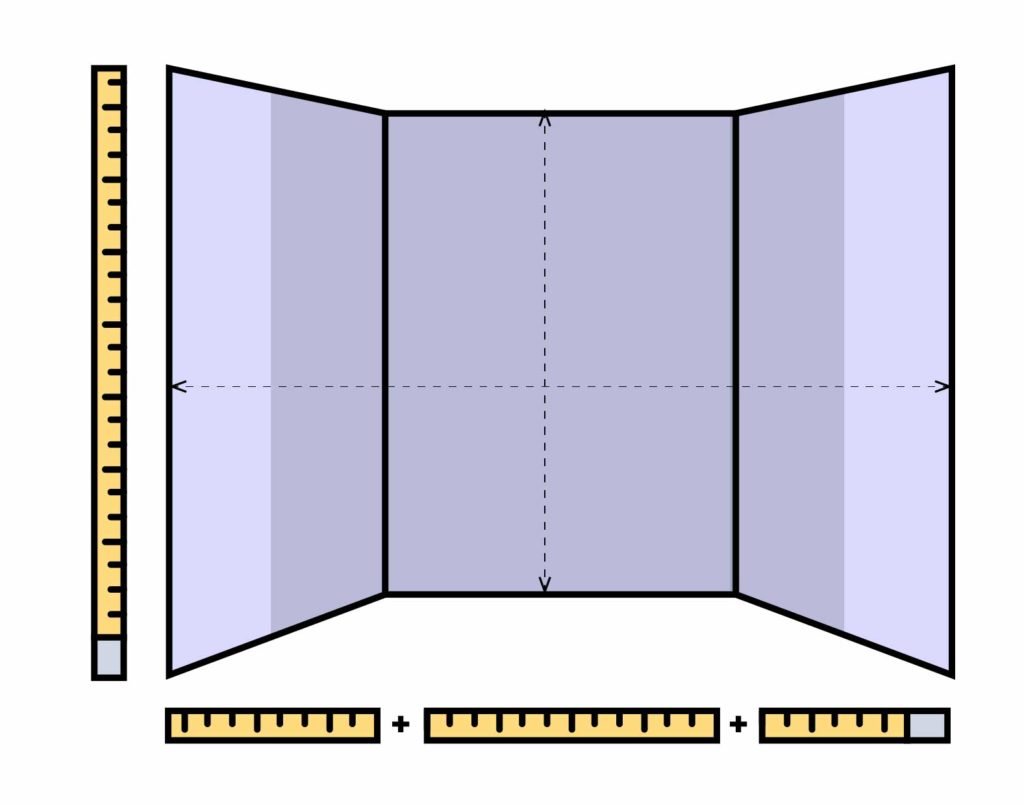
Measuring several walls in a row
Measure the overall height and then the width of each wall. Then add up the widths so that you can see them as a single wall. Since walls are rarely straight, consider adding 5-10 cm to your measurements for accuracy.
💡 Don’t divide your project into multiple orders so that the connections can follow each other seamlessly.
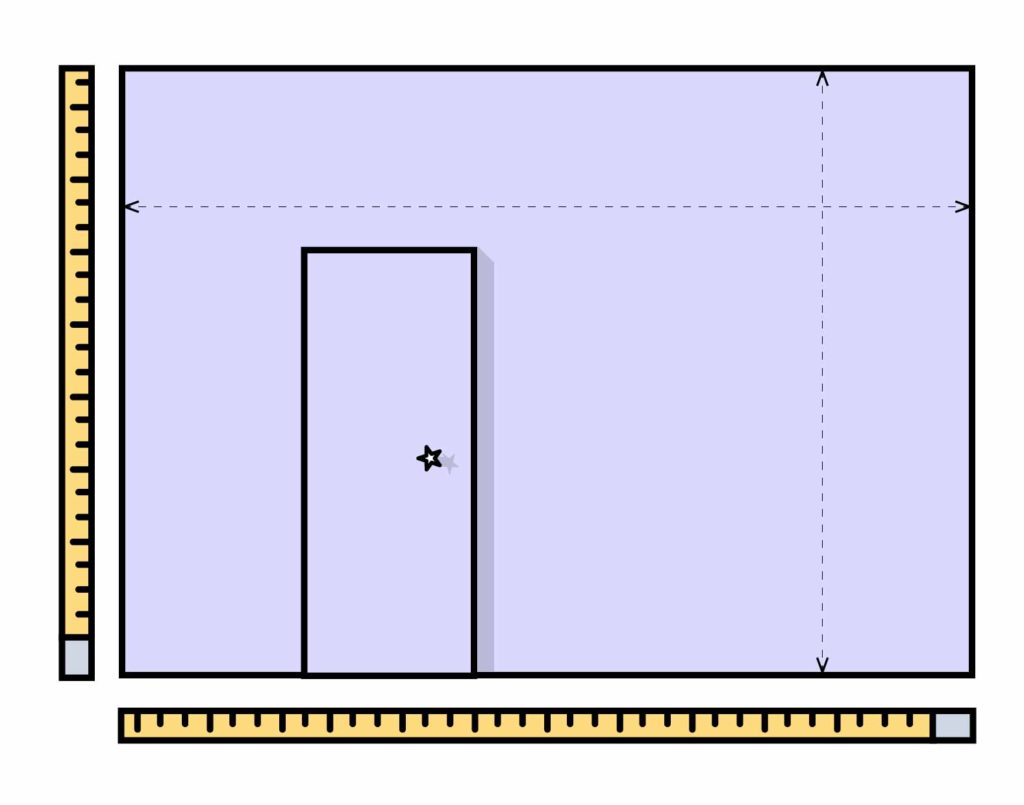
Measuring a wall with a door
Take measurements of the width and height of your wall without considering the door. If you wish, you can put the wallpaper on the door to maintain the visual continuity of the wall, by simply removing the door frame from your measurements. You can also usescraps to personalize a piece of furniture or create a decorative reminder.
As walls are rarely straight, remember to allow a small margin for installation (we recommend between 5 and 10 cm).
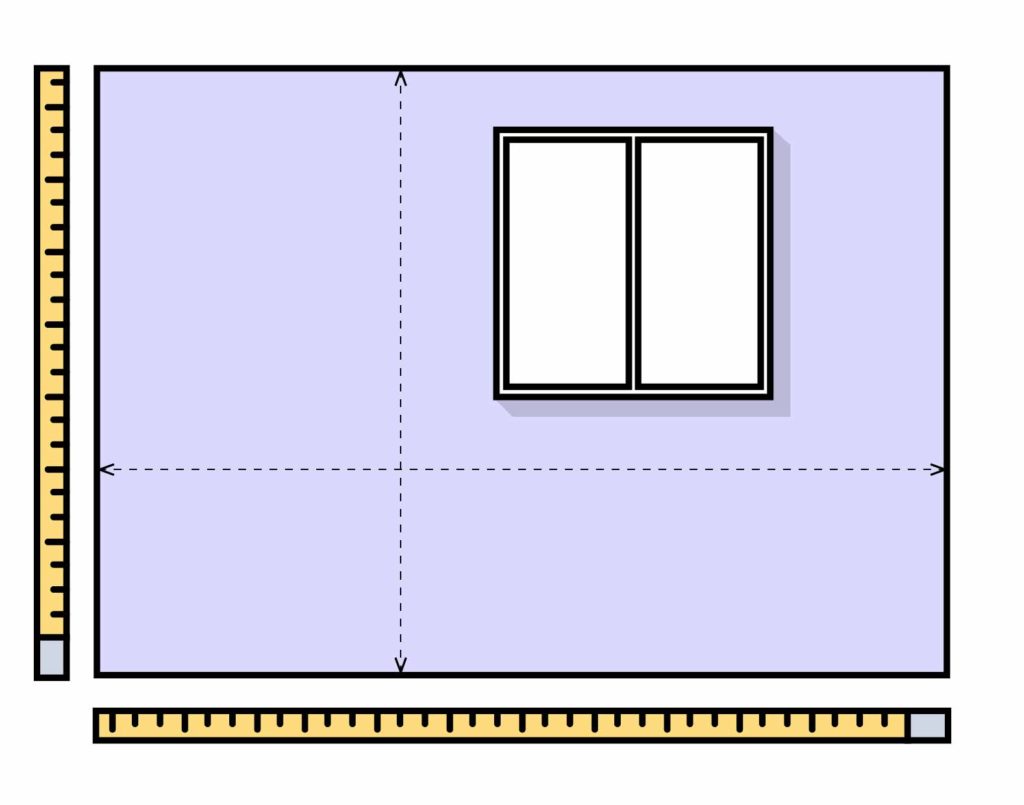
Measuring a wall with a window
Take measurements of the width and height of your wall without considering the window. If you wish, you can use the scraps to personalise a piece of furniture or create a decorative reminder.
As walls are rarely straight, remember to allow a small margin for installation (we recommend between 5 and 10 cm).
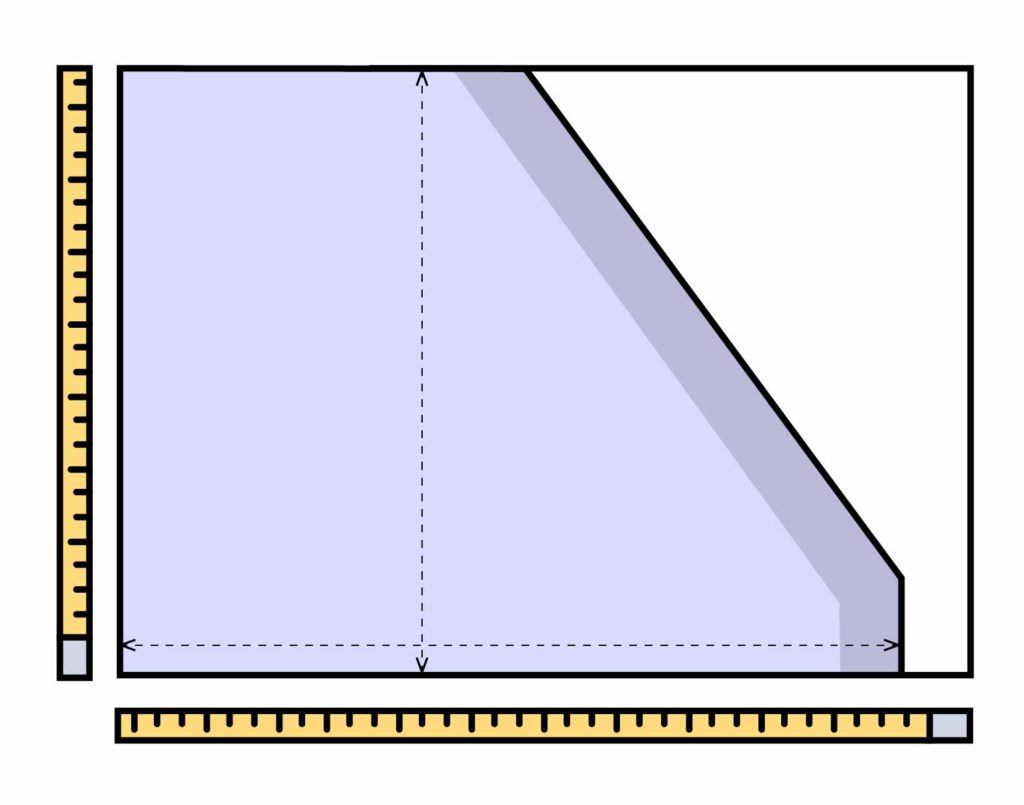
Measuring an attic wall
Measure the width and longest height of the wall as if it were a standard, regardless of the slope. You can use the scraps to personalize a piece of furniture or create a decorative reminder.
As walls are rarely straight, remember to allow a small margin for installation (we recommend between 5 and 10 cm).
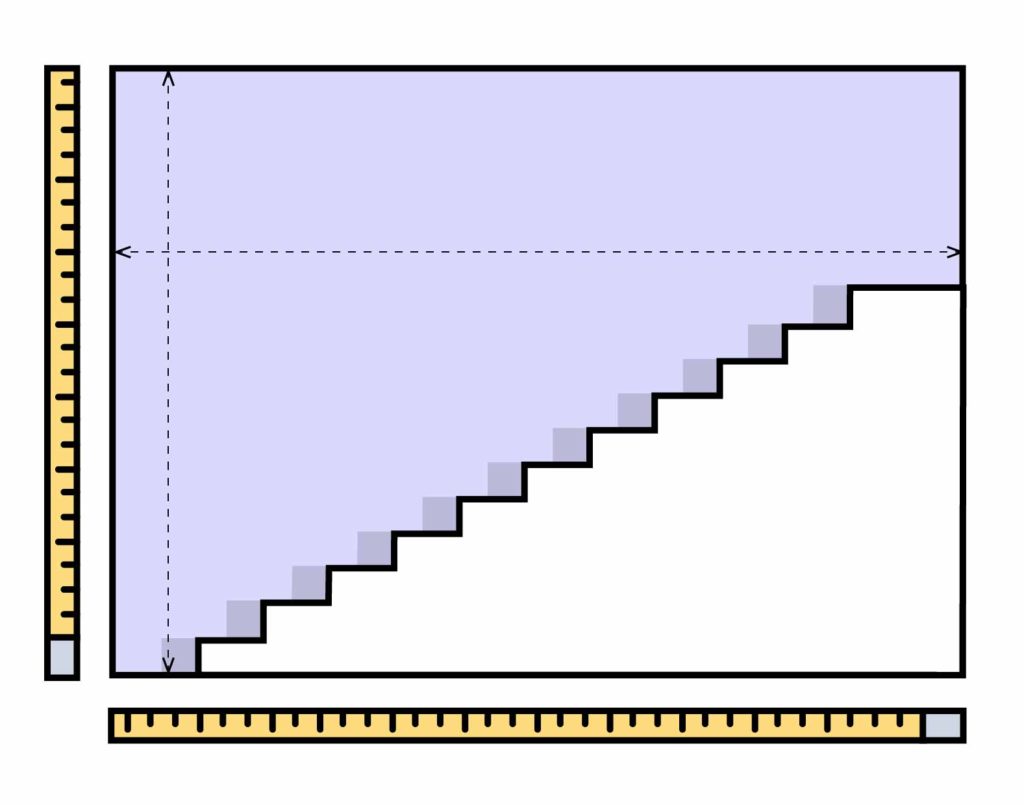
Measuring a wall in a staircase
To measure a wall on a staircase, start from the lowest point, at the foot of the first step, to the ceiling to obtain the maximum height. Then measure the overall and horizontal width of the wall, as if it were a straight wall and not diagonally.
Start the installation with the panel that covers the greatest height of the wall for optimal alignment.
Remember to add 5 to 10 cm of margin and always measure at the highest and widest point of the wall for a perfect look.
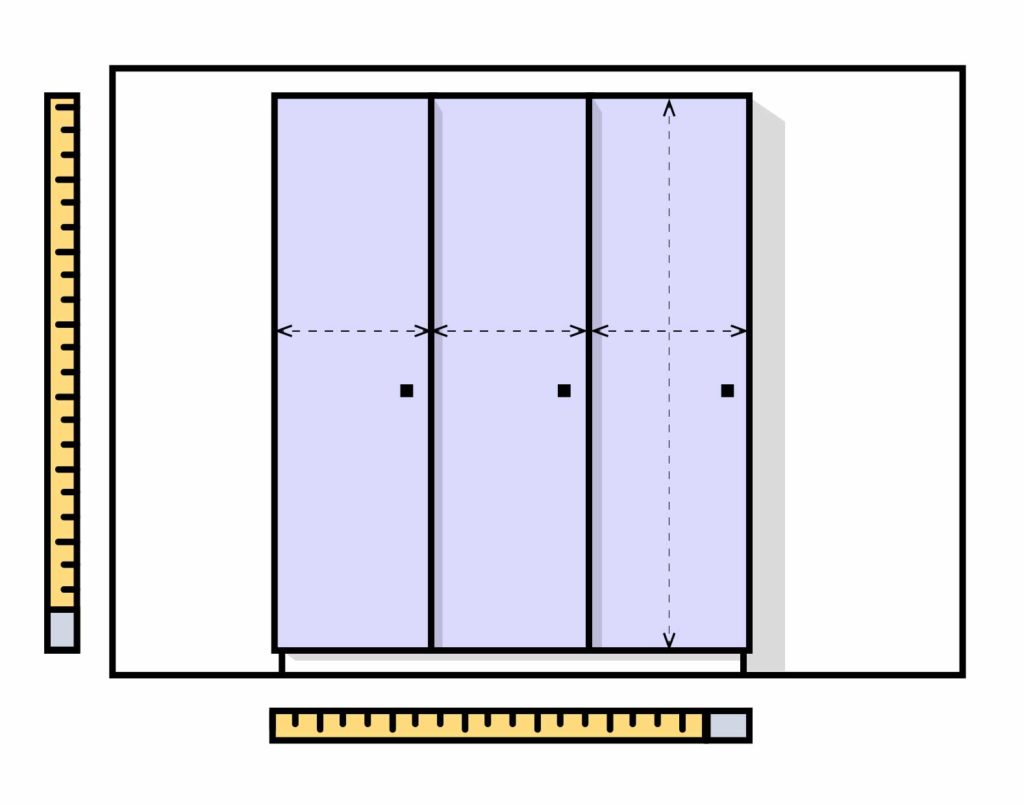
Measuring cupboard doors
Reasons for repetition:
Take measurements of each door, including width and height.
For more comfort during installation, add 2 cm to your measurements.
If you have multiple doors (the same size), simply click on the small “+” once in your cart.
Panoramic pattern:
Measure the overall height first, then the width of each door. Then add these widths together to treat them as a single strand.
If the number of panels indicated by the configurator does not correspond to the number of doors you have, contact us at the following address: contact@wellpapers.com for a personalized quote.
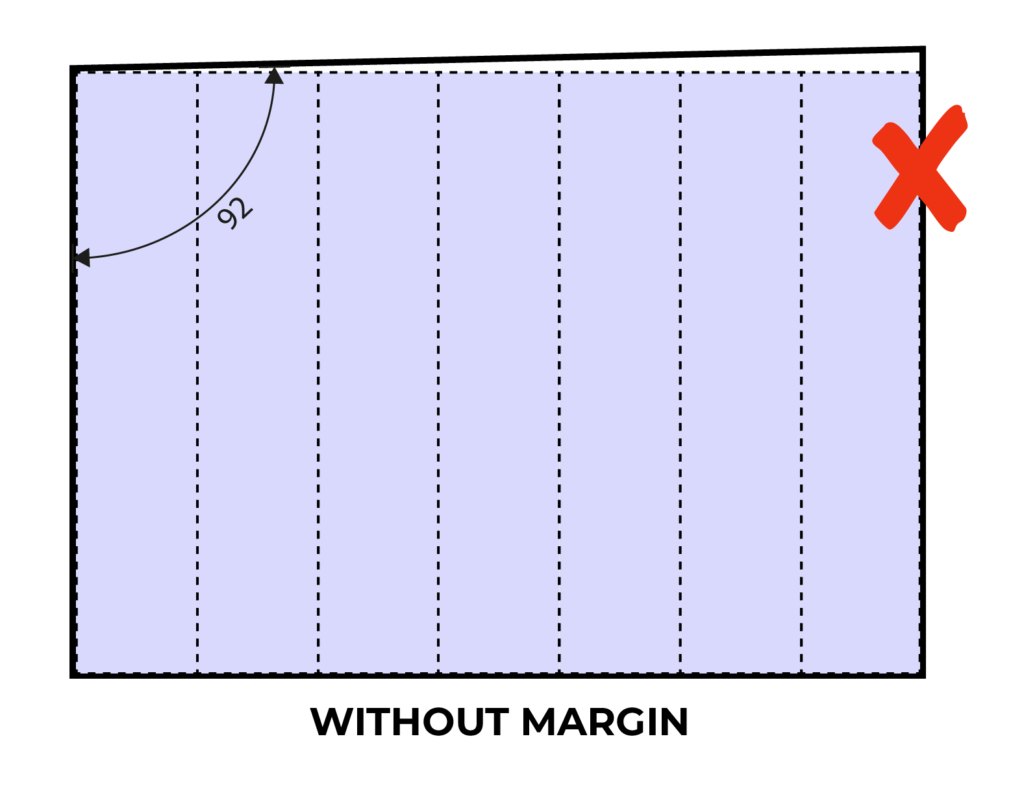
Why allow between 5 and 10 cm of margin?
To earn more money and do business seminars in Miami? No. Walls don’t always have
Allowing a margin of 5 to 10 cm allows you to slightly overflow the wallpaper onto the ceiling, the adjacent wall or both. This provides greater flexibility and ensures a perfectly aligned look, even if the wall is imperfect.
That’s it, you know everything. You are ready to choose your wallpaper.
FAQs: Frequently Asked Questions
- What tools are needed for wallpaper installation?
To install our wallpapers, you will need a marouflette, a cutter, a wheel, a pencil and a cloth. All of this is available in our beautifulWellpapers installation kit . For the installation of pre-pasted wallpapers, you will need to use a sprayer (AKA “pshit-pshit” and water to activate the glue).
- What customization options do you offer?
At Wellpapers, we offer you many options to customize your wallpaper. In addition to custom-made, you can change the density of the patterns on the standard models yourself. And that’s not all, for all our creations, our Creative Studio can move, add or remove elements or change colors. An additional charge may be added to the final price depending on the customization.
- What support can I put the wallpapers on?
We recommend that the pre-pasted wallpaper be installed on a smooth, dry and clean wall. If the wall has been painted recently, wait between 4 and 6 weeks preferably. It is important to have a porous surface so that the glue of the paper adheres perfectly to its backing. For this, the raw surfaces require at least one undercoat of paint. We recommend installing adhesive wallpaper on small, smooth surfaces (cupboard doors, refrigerators, furniture, splashbacks, etc.).